
How to Set Up VentroTap™ Profile?
A STEP BY STEP GUIDE WITH VIDEO REFERENCES

STEP ZERO
Choose Your Situation
To get started, please select the option that matches your case. If you purchased the wallet using your own email, tap “I used my own email” to continue with the setup steps. If the wallet was given to you as a gift, tap “Got it as a gift” and we’ll guide you through linking the wallet to your email.

STEP ONE
Create an Account
- Go to the Create Account page.
- Fill in your First Name, Last Name, Email Address, and Password.
- Press Create Account.

STEP TWO
Check Your Email
- After creating the account, an activation email will be sent to the email address you provided.
- Open that email and click the Activate Account button.
- Without this step, your account will not work.

STEP THREE
Log In
- Once your account is activated, go to the Login Page.
- Enter your email address and password.
- This will take you to your VentroTap™ Dashboard.
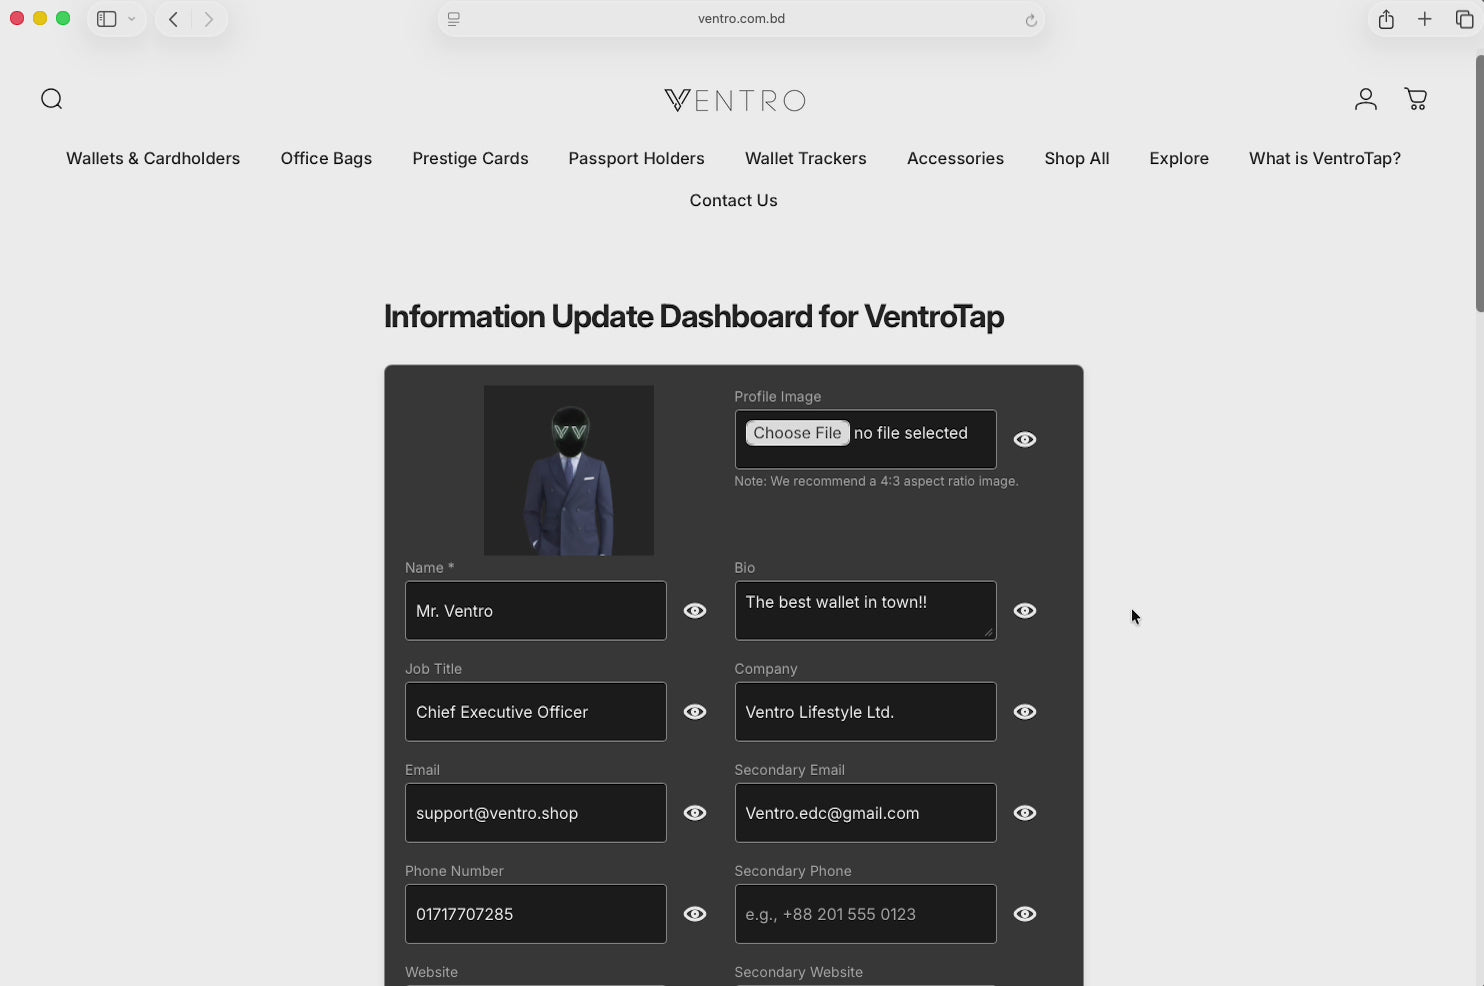
STEP FOUR
Update Your Information
- Inside your dashboard, you can add or edit your details: Profile Picture, Name, Phone number, Email, Social links (Facebook, LinkedIn, Instagram, etc.), Website or company info ect.
- This is what people will see when they tap your wallet.
- You can update this anytime.
Need to Update Your VentroTap™ Email?
If your wallet was purchased with the wrong email, or you received it as a gift, you’ll need to update the email linked to your VentroTap™ profile. This ensures you can activate your account, access your dashboard, and keep your contact details up to date.